I always talk about ways that automation can make your business and blogging processes easier (here are all my posts about automation). You may want to start automating some of your processes, but just don’t know where to start. My first piece of advice is always to check the integrations that are a part of the programs and online tools that you already use (aka native integrations). The setup for these integrations is usually easy since you’re only linking one app to the one you’re already in, and the integrations often contain automation to make your workflows smoother.
There are many tools that include native integrations, but today I will be sharing three popular tools and some of the useful integrations that focus on automating your tasks.

1/ Trello
My favorite tool for organizing everything from business tasks to vacation planning to Christmas planning has different types of automation built into their platform.
Google Calendar sync- this is an awesome power-up (power-ups is what Trello calls their add on tools) where you can connect your Google Calendar to a Trello board, and when you schedule due dates for cards and/or tasks, they will also sync to your calendar.
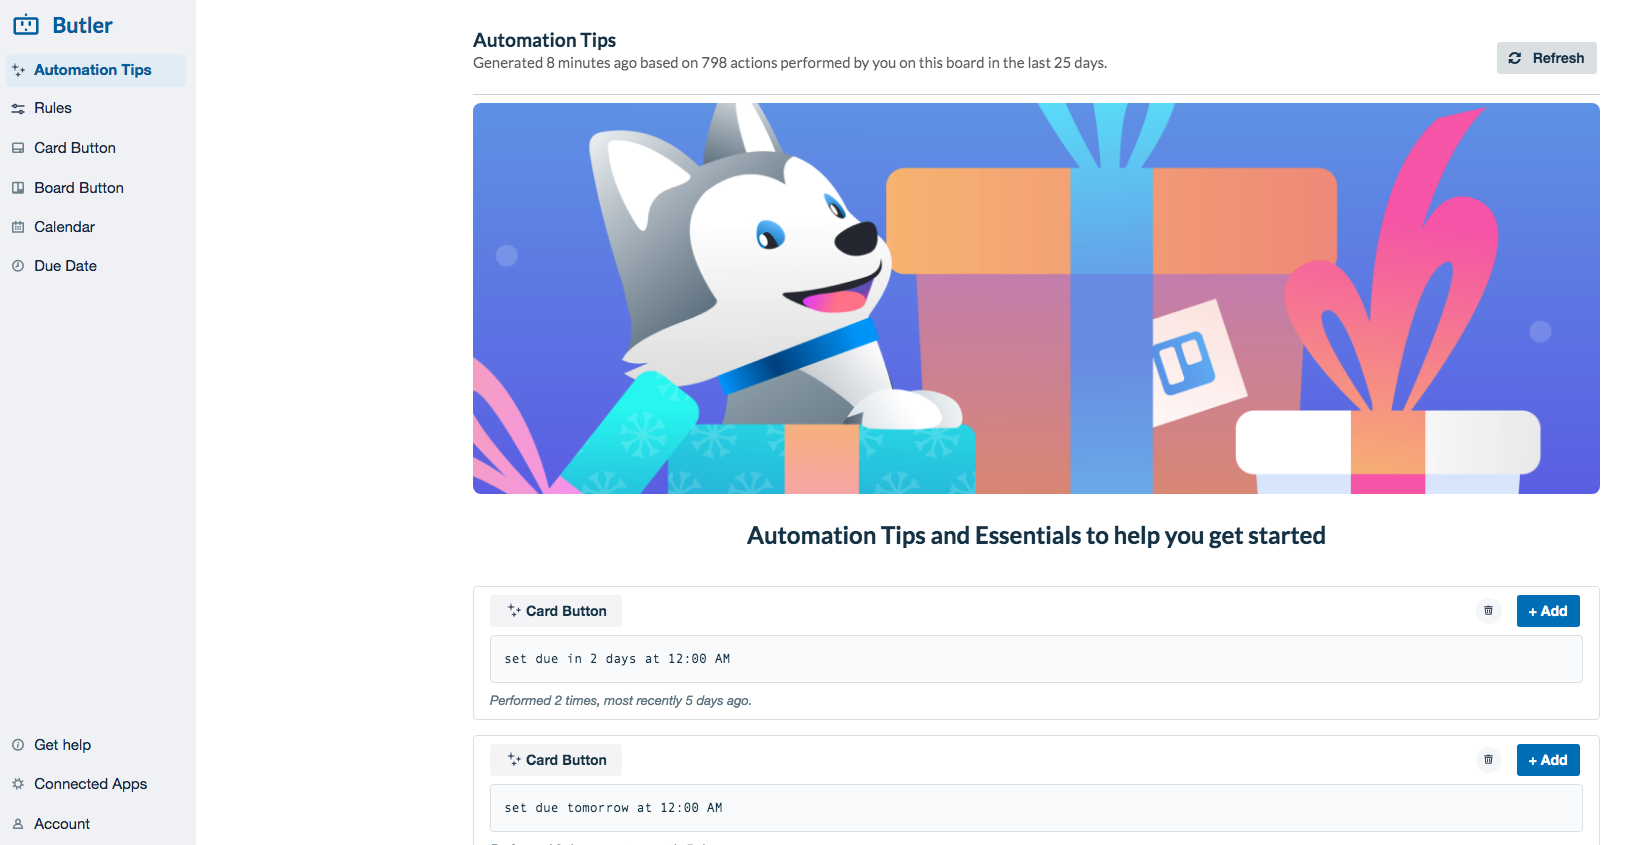
Custom automation using Butler- you can create custom automations for your boards and cards using Trello’s automation tool called Butler. You can easily create automated tasks for the following:
Automation Tips- this is where Trello suggests automations you can set up based on your activity in your Trello boards. If you frequently do the same types of things in your boards and cards, it suggests an automation to set up for it.
Rules- this is where you can create a custom rule to make a task automatically occur based on the rule you have set. Think of this as the rules in your Gmail or Outlook email accounts that you can create. You can get very specific with the actions you want to occur, and the setup
Card Button- you can create a button that performs an action that you have set for it. For example, if you want to push a button to make all tasks in a card be marked off rather than clicking each checkbox individually, you can create a button for that.
Board Button- this is the same concept as a card button, however, the action that you set for this button will apply to all cards in the board that fit the button criteria. For example, if you want to archive every card that is complete on your board, you can do this with the click of one button.
Calendar- this type of automation is where you can set up recurring actions. For example, if you want a card to be created in one of your lists every Monday at 7:00 am, you can set this up to occur.
Due Date- due date automation can occur based on due dates you have set for cards and/or checklist items. For example, if you want all cards that are past due to move to the top of a list in your board, you can set the automation up to do so.
2/ Canva
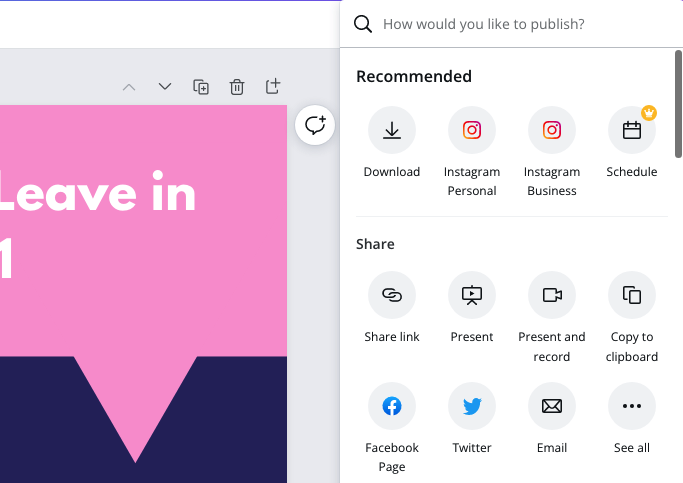
Canva is such a useful and popular tool! I have a graphic design degree and was taught to use Adobe products for creating graphics, however, the ease and multiple layers of functionality that Canva brings is making me consider switching over to them for the bulk of my graphic design creations. Aside from its ease of use, did you know it even has automation built into it? One of the best automation features is that you can schedule your Instagram posts directly in Canva using the Content Planner or the Canva Editor. This means rather than downloading your designs then uploading them to IG or another scheduler tool, you can do it all without leaving the app!
If you use Canva to create your social media graphics and other content, this is a perfect way to streamline your social media process. You can schedule posts for Instagram, Pinterest, Twitter, LinkedIn, Facebook (pages and groups), Slack and Tumblr using a computer or mobile devices (productivity on the go!).
Notes:
You must have a Canva Pro, Canva for Enterprise, or Canva for Nonprofits users account to use this feature and an Instagram Business account for IG posts.
Instagram Stories and Reels aren’t supported on desktop, but you can share Stories and Reels from the Canva mobile apps.
You can only schedule one image to post at a time, so carousels are not compatible with the scheduler.
3/ MailChimp
Mailchimp is still an incredibly popular email marketing platform with plenty of native integrations. There are too many to name in fact, but here is a snippet of different online tool categories they integrate with:

The two integrations that I find most helpful are-
Canva- you can create designs for your emails and save them directly to your Mailchimp account. This is useful because you no longer need to save your designs to your computer then upload to Mailchimp. Though this isn’t exactly automation, the integration speeds up your workflow and streamlines it…something equally as helpful as automation to me.

Instagram Content Block- a great feature for cross-promotion (promoting your content in different places at once) is the Instagram content block. This is an integration that shows your instagram feed in your Mailchimp email. You can control how the feed appears in the email, and you can even include the posts full description to further promote your brand message.
These are many different ways that you can add automation easily to your processes in tools that you already use daily. Check the Integrations section of your favorite tools and see what you can start automating today!


